As an Amazon Associate I earn from qualifying purchases.
This post contains affiliate links.
A cookie stamp is a great tool for adding a unique and creative touch to your cookies. Whether you’re making holiday treats, special occasion cookies, or just want to add some extra pizzazz to your cookie baking, a cookie stamp can help you do just that. In this post, we’ll cover everything you need to know about using a cookie stamp, from the types of cookie stamps available to how to use them with different types of cookie doughs. We’ll also provide some creative recipe ideas, so you can get started right away. So, let’s get started!
Gather your ingredients and supply
Before you can start using your cookie stamp, you’ll need to gather your ingredients and supplies, including the cookie dough and other ingredients, the cookie stamp, and any other equipment you may need. Make sure to confirm that you have all the required ingredients and supplies before you start.
Select your cookie stamp
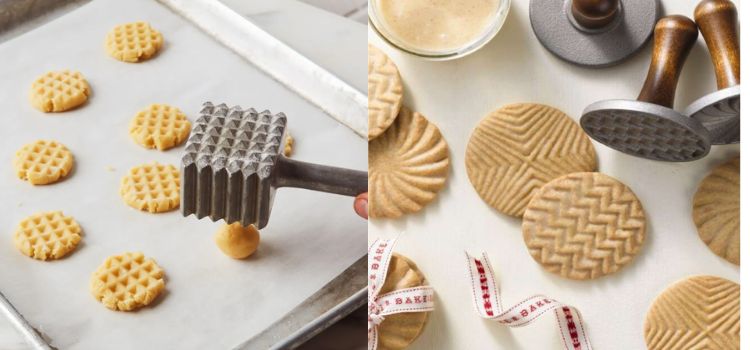
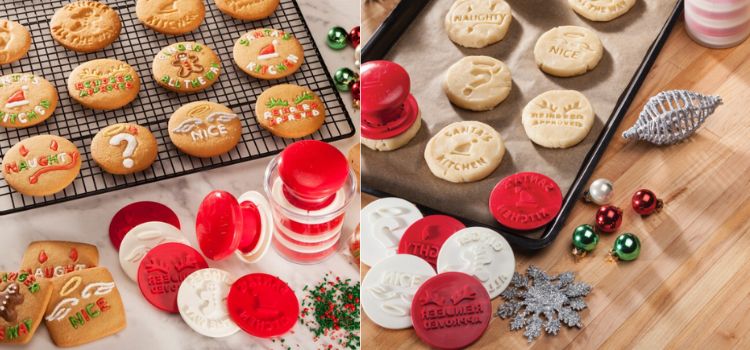
Once you have all your supplies, it’s time to select your cookie stamp. There are many different types of cookie stamps available, so be sure to choose one that best suits the type of cookie you are making. Your cookie stamp should also be the right size or shape for the type of cookie you are making.
Preheat the oven and prepare your baking sheet
Preheating the oven is an essential step when using a cookie stamp. This guarantees even baking of the cookies and assists in preserving their shape. Prior to using your cookie stamp, be sure to prepare your baking sheet with parchment paper or a silicone baking mat to avoid the cookies sticking to the pan.
You may also want to spray your cookie stamps with non-stick baking spray before you use them. This will help the cookies come out clean and make it easier to clean the stamp when you’re done. Lastly, ensure to assess the size and shape of your cookie stamp.
If it happens to be too large, your cookies might spread excessively. If it’s too small, they may not come out the right shape.
Mix the cookie dough
Thoroughly according to the recipe instructions. It’s important to mix the dough until it’s smooth and even. If you leave lumps or pieces of butter in the dough, the cookies won’t bake evenly.
Make sure to scrape the sides and bottom of the bowl while mixing to ensure that all of the ingredients are incorporated. Once the dough is thoroughly mixed, you can begin shaping the cookies. If the dough is too sticky, try adding a little more flour and mixing until it’s a manageable consistency.
Keep in mind that the dough will continue to firm up and become more manageable as it chills. If you don’t plan on baking the cookies immediately, cover the bowl with plastic wrap and store it in the refrigerator until you’re ready to bake.
Roll out the dough and cut it into shapes
By extending it on a surface lightly dusted with flour. To keep the dough from sticking to the board, lightly sprinkle a bit of flour over the top of the dough and use a rolling pin to spread it. Flatten the dough to approximately a quarter of an inch thickness and shape it using a cookie cutter.
If you want to make intricate shapes, use a small cutting wheel or a paring knife. Be sure to press down firmly and evenly to ensure that each cookie has the same shape and thickness.
After cutting all the cookies, gently move them to a baking sheet covered with parchment paper or a silicone baking mat. If your dough is too soft to move, refrigerate it for about 10 minutes before transferring to the baking sheet. This ensures that the cookies maintain their shape during the baking process.
Place the cookie shapes on the baking sheet
In an orderly fashion. Make sure that the cookies are spaced evenly apart. This contributes to an even baking of your cookies, giving them a crispier texture.
Also, try to make sure that the cookies are not touching each other. If the cookies are touching, they may spread out and become soft. Also, when placing the cookie shapes on the baking sheet, make sure to leave a bit of room between the cookies and the edge of the baking sheet.
This will help ensure that the cookies do not stick to the sides. Finally, when transferring the cookie shapes to the baking sheet, make sure to use a metal spatula. This will help you to avoid damaging the cookie shapes as you transfer them. Now your cookie shapes are ready for baking.
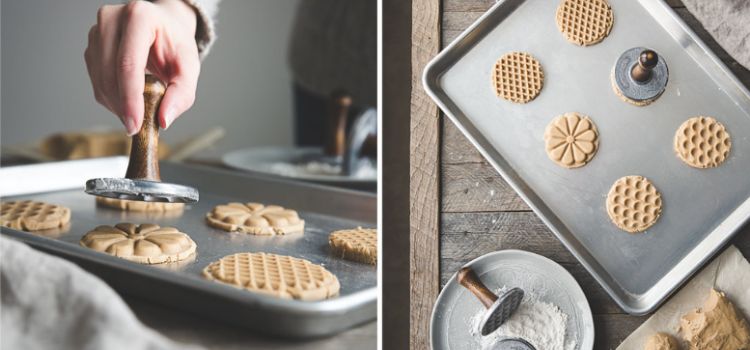
Use the cookie stamp to imprint the design on the cookies
This is an easy way to make the cookies look professional and give them a unique look. Start by placing the stamp on the cookie and pressing down firmly. Make sure that you don’t press too hard or you could damage the cookie shape.
Once you have stamped the cookie, lift the stamp away and then carefully transfer the cookie to the baking sheet. Make sure to place the stamp back in its safe place. Now your cookie shapes are ready for baking.
You don’t need to worry about the cookie shape being distorted during the baking process. The design will be imprinted on the cookie and will not fade away when you remove them from the oven. Using the cookie stamp ensures that your cookies turn out perfect and will make them look amazing.
Bake the cookies in the preheated oven
For the recommended amount of time. Ensure that the oven is set at the proper temperature before putting in the cookies. It’s important to watch the baking process to make sure the cookies don’t over bake.
To prevent the cookies from drying out, consider brushing them with melted butter or oil before placing them in the oven. Position the baking sheet with the cookies on the middle rack for even baking. Take them out when they turn golden-brown and let them cool on the baking sheet.
Gently transfer the cookies to a cooling rack and allow them to cool completely before serving. With the help of a cookie stamp, you can easily decorate your cookies with beautiful designs. Use a light touch and make sure that the cookie is completely pressed onto the stamp
Conclusion
In conclusion, using a cookie stamp can be a great way to make beautiful and unique cookies for your friends and family. It’s a simple and enjoyable method to craft stunning designs that will leave a lasting impression on everyone.
With the right techniques and tips, you can make the perfect cookie stamp that everyone will love. Plus, it’s a great way to get creative and have some fun in the kitchen. Feel free to give it a go!
As an Amazon Associate I earn from qualifying purchases.


[…] Whether you’re a busy parent looking to pack healthy snacks for your kids or a chef in need of precise apple slices for your culinary creations, we’ve got you covered. Let’s dive into the world of apple cutters and find the perfect one for you. […]