As an Amazon Associate I earn from qualifying purchases.
This post contains affiliate links.
Clean an electric percolator are a great way to make your morning cup of coffee. Ensuring optimal functioning of your percolator requires regular cleaning. If you don’t, the residue buildup can affect the taste of your coffee and can even lead to health issues.
In this blog post, we’ll look at the steps you need to take to properly clean your electric percolator. We’ll also provide tips to help you prevent the buildup of residue in the future. So, let’s get started!
Unplug and Disassemble the Percolator
The first thing you need to do when you’re cleaning your electric percolator is to unplug it from the power source. Once it’s unplugged, remove the basket from the top and the decanter from the bottom. If you’re unable to remove the basket and decanter, you may need to refer to your percolator’s user manual. Next, dispose of the used coffee grounds from the basket and give it a good rinse with warm water.
Place the basket and decanter in separate bowls and fill them with warm, soapy water. Allow them to soak for a few minutes, then rinse them with fresh water and dry using a gentle cloth. Finally, replace the decanter and basket back in the percolator and make sure the lid is tightly closed. Finally, you’ll need to give the outside of the percolator a good wipe down.
Use a damp cloth and some mild detergent to get rid of any dirt and grime. Make sure to give special attention to the filter screen, as this will help to keep your coffee tasting fresh.
Clean the Pot and Lid
To begin, ensure that the power cord is unplugged from the wall. Afterward, dispose of the used coffee grounds from the basket and thoroughly rinse it with warm water. This step is crucial for eliminating any leftover grounds and oils from both the pot and lid.
Next, remove the top of the decanter and discard the used grounds. Place the basket and decanter in separate bowls and fill them with warm, soapy water. Allow them to soak for a few minutes, then rinse them with fresh water and dry using a soft cloth. This process effectively removes stubborn stains and oils.
Finally, replace the decanter and basket back in the percolator and make sure the lid is tightly closed. Finally, you’ll need to give the outside of the percolator a good wipe down. Use a damp cloth and some mild detergent to get rid of any dirt and grime.
Make sure to give special attention to the filter screen, as this will help to keep your coffee tasting fresh. Once finished, plug the power cord back in and you’re ready to start brewing some delicious coffee.
Clean the Tube and Filter
Regularly check your coffee maker to guarantee optimal flavor and performance from your machine. To start, unplug the power cord, then use a damp cloth to wipe off the outside of the machine. Next, remove the filter screen, rinse it off with warm water and a mild detergent, and use a soft brush to remove any residual buildup.
If the tube is clogged with coffee grounds, use a long thin brush or pipe cleaner to dislodge the buildup. Finally, rinse the filter screen thoroughly and allow it to dry completely before re-installing it into the coffee maker.
Once finished, plug the power cord back in and you’re ready to start brewing some delicious coffee. Regular cleaning of the tube and filter will ensure your coffee maker runs smoothly and delivers the best-tasting coffee possible.
Clean the Heating Element
Of your coffee maker regularly to maintain a long life of use. Unplug your coffee maker, then unscrew and remove the heating element. Wash the element with warm water and gently wipe it down with a soft cloth.
If there is any residue on the element, you can use a cotton swab with a bit of vinegar to clean it. Once the element is clean, dry it with a paper towel. Then reassemble the coffee maker. Make sure that the element is attached securely and the lids are screwed back on tightly. Plug the power cord back in and you’re ready to start brewing some delicious coffee.
Clean the Percolator Body
Before you begin the cleaning process, make sure to disconnect your coffee maker from the power source. Remove the heating element, then use a damp cloth to wipe down the percolator body. If there is any residue or build-up on the body, use a cotton swab and a bit of white vinegar to clean it. Once you have wiped it down, use a paper towel to dry it.
Reassemble your coffee maker and make sure the power cord is plugged in securely. Finally, reattach the heating element and screw on the lids tightly. Now, your coffee maker is prepared to brew delicious coffee whenever you desire. With regular cleaning, you can make sure that your coffee maker lasts a long time and always produces great-tasting coffee.
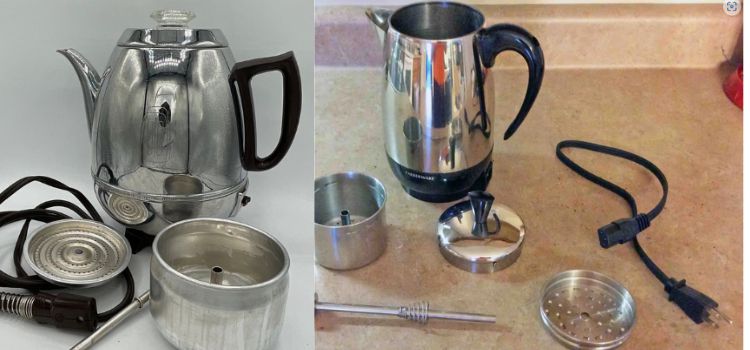
Reassemble the Percolator
By adhering to the guidelines provided with your specific model. Most models have the same basic parts: the base, the filter basket, the lid, and the percolator stem. Position the base on a steady, heat-resistant surface.
Set the filter basket into the base and cover it with the lid. Align the percolator stem with the base and twist it securely into position. Lastly, add coffee grounds to the filter basket and fill the base with cold or room temperature water.
Once the percolator is reassembled, it is ready to use. To get the best results, clean your coffee maker regularly, as this will prevent residue buildup and extend its life. Enjoy your freshly brewed coffee!

Test the Percolator
After the percolator is reassembled, you can fill the reservoir with cold, fresh water and measure out the desired amount of coffee grounds. Next, place the filter basket in the proper position and screw in the lid, making sure that it is secure.
Place the percolator on top of the stove and turn the heat to medium. Let the pot reach a boil, then reduce the heat to low. Let the pot percolate for approximately 8 minutes, or until the coffee is strong and flavorful. Once you’ve achieved the desired strength, switch off the heat and let the pot cool. Once cooled, it’s ready for use.
For best results, clean your electric percolator regularly, as this will prevent residue buildup and extend its life. Enjoy your freshly brewed coffee!
Conclusion
In conclusion, cleaning an electric percolator is easy and doesn’t take much time. You just require some essential cleaning supplies, a touch of patience, and a bit of effort to get the job done. First, you should empty the coffee grounds from the percolator and rinse it out with warm water. Next, take a gentle cloth or sponge and wipe the inside of the percolator. Finally, you can use a mild detergent to clean the exterior and leave it looking like new. With these simple steps, your electric percolator will be sparkling clean and ready for your next cup of coffee.
As an Amazon Associate I earn from qualifying purchases.


Leave a Reply